I got it in my head that the factory BIOS on my venerable Lenovo X201 was too old, so I decided to replace it with a Coreboot BIOS. [1] Since I was going to all the trouble to hook my finicky Pomona clip to my Raspberry Pi, I also decided to take advange of the best perk of a third-party BIOS: a custom splash screen image. Since neither S in F/LOSS stands for simple I'm recording how to create an image that will actually display, partially for anyone who happens to stumble across this blog, but mainly for me when I need to do it again in two years and I've forgotten.
Selecting The Image
The size of the image you can use as a splash screen is limited by the framebuffer you specify during setup - too small and the image doesn't fit, too large and the image is off-center. You can match the framebuffer to your display's native resolution - I did this - but since SeaBIOS supposedly only supports a small number of resolutions you may need to choose a larger or smaller resolution to find one SeaBIOS will display.
Now that you have a framebuffer resolution, you have a target size for your image. Note that I said a target size, not the exact size - I haven't confirmed this but online comments have suggested image dimensions must be an even multiple of 16 so you may only be able to use a 1344px-wide image on your 1366x768 display. [2] If your desired image is already a compatible resolution, congratulations on your enviable combination of foresight and luck; the rest of us need a quick detour - you can either crop a section of the image with the target dimensions or scale the image to fit and use black bars on the unfilled axis.
At this point I should note that I've read reports of SeaBIOS using the whole display for the contents of the framebuffer, stretching a 1024x768 image in a 1024x768 framebuffer over a 1440x900 monitor for that retro 2003-XP-desktop feel; I cannot confirm myself but you may be able to compensate by scaling your image from your monitor size to your target resolution (e.g., making your image look correct in 1440x900, then scaling it down to 1024x768 in expectation of it being stretched out again).
Coloring The Image
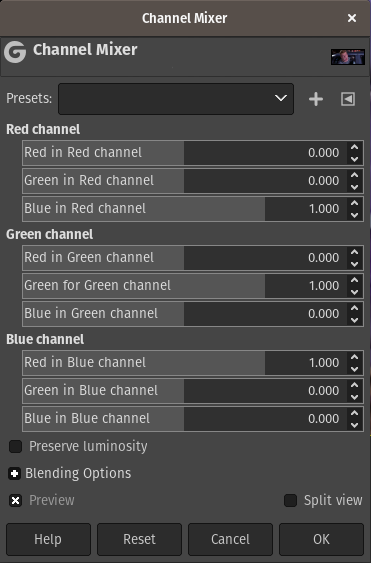
Now we can stop caring about Coreboot framebuffer jank and start caring about SeaBIOS JPEG decoder jank. The decoder expects BGR pixel data, while most image editors export images with RGB pixel data; this means you'll have to flip the red/blue channel values in your image, either using a photo editor like GIMP:
or using a separate tool like ImageMagick:
convert bootsplash-original.jpg -color-matrix '0 0 1 0 1 0 1 0 0' bootsplash-matrixed.jpg
Exporting The Image
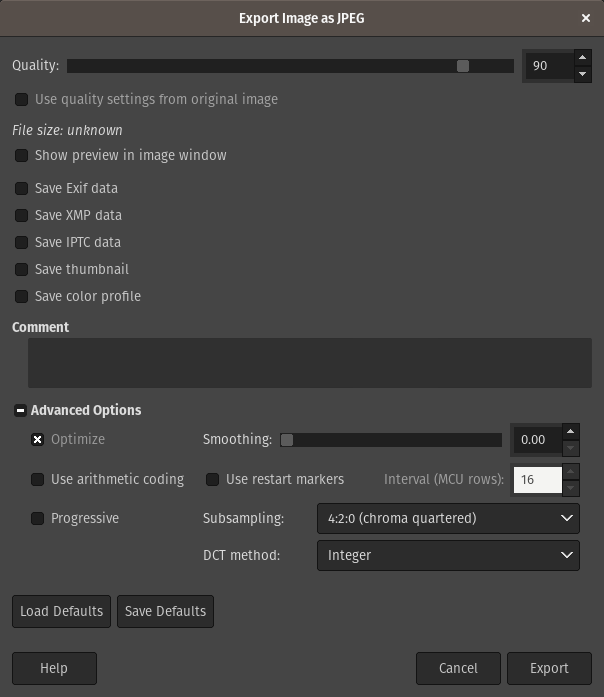
Unfortunately, the SeaBIOS JPEG decoder jank continues. The decoder requires non-progressive JPEGs with 4:2:0 subsampling; [3] your JPEG export settings should look something like this, depending on your image editor:
Wrap-up
At this point you should now have a JPEG that will work with SeaBIOS; all that's left is to stick it in a Coreboot ROM and enjoy the fruits of your labor.

| [1] | To be fair, the factory BIOS was super old and assuredly full of bugs but that wasn't the primary reason I went through all the hassle of Corebooting my laptop |
| [2] | The X201 is native 1280x800 so I cannot debunk this with my setup |
| [3] | No progressive JPEGs allowed? This decoder really is conservative huehuehuehue |